StorSimple integrated into a Microsoft Server OS? StorSimple using SMB natively? StorSimple as a VM in your own datacenter? People thought that it would never happen, but Microsoft surprised those with the release last week of a Virtual StorSimple Appliance which can be hosted in your own (local) datacenter.
Important Notice: This feature is still in preview. This means that the virtual device is not supported in production environments!
This ofcourse does not directly remove the burden of data congestion on your own storage capacity on-premises, since it utilizes your own physical storage to create a (small) Virtual Disk as part of the total storage capacity the tiny vm utilizes.
Tiny?
When Microsoft acquired StorSimple back in the days (aprox. 2 years ago) it was “just” a physical storage device with storage break-out to the cloud, powered by a….. ehm “third party” Operating System. Since Microsoft now loves Linux, I think I can mention that it had something to do with a certain black&white animal that lives near the equator and Antarctica. This could have had a tiny footprint, I can imagine, but it has come a long way since then. The pre-requisites for the VM-based solution are quite unexpected.
Pre-requisites
- A Storage Account with the amount of redundancy (GRS, ZRS or LRS) of your liking.
- Hyper-V or VMware ESXi based virtualization platform
- You downloaded the VHD of the on-premises VSA as vhd
- A Generation 1 virtual machine with
- A minimum of 4 cores
- at least 8 Gb RAM
- At least one network interface, connected to a virtual switch
- A 500GB – 8TB virtual disk for data storage
- A 32 character encryption key
- (Optional) an AD Security group who will be accessing the StorSimple (SMB) share.
On-premises StorSimple Setup
First off, create your Storage account in a region of your liking, for now (21st of december 2015) the on-premises StorSimple service is only supported in regions “West US” en “Japan East”. For this reason I’ve deployed my storage account (for this walk-through at least) to the same region.

When the StorSimple Management Service is created, it’s time to grab the latest virtual appliance bits from the “Devices” tab in the console and download it for your virtualization platform.


I used the following PowerShell script to provision the Virtual Machine with the downloaded StorSimple VHD when it was downloaded to my Hyper-V host.
New-VM -VHDPath $VHDPath -Generation 1 -MemoryStartupBytes $MemoryStartupBytes -Name $VMName -Path $VMPath -ComputerName $HVHost
Set-VMProcessor -VMName $VMName -ComputerName $HVHost -Count $Procs
New-VHD -Path “$DataVHDPath“ -Dynamic -SizeBytes 500GB
ADD-VMHardDiskDrive -VMName $VMName -Path $DataVHDPath -ComputerName $HVHost -ControllerType SCSI
Connect-VMNetworkAdapter -VMName $VMName -ComputerName $HVHost -SwitchName $Vnet
Remove-VMDvdDrive -ComputerName $HVHost -VMName $VMName -ControllerNumber 1 -ControllerLocation 0
Start-VM -ComputerName $HVHost -Name $VMName
After that the machine booted into a Virtual Network with an active DHCP server and I could logon to the Windows Server 2012 R2 logon prompt, to find nothing more then a prompt-window. I expected to find commands like Invoke-HCSSetupWizard as it is present in the 8000 series StorSimple, but instead the configuration of this virtual StorSimple is done through a compact webservice. So far for a uniform setup experience, but this might be something to be added in the future, in this time of continuous deployment.
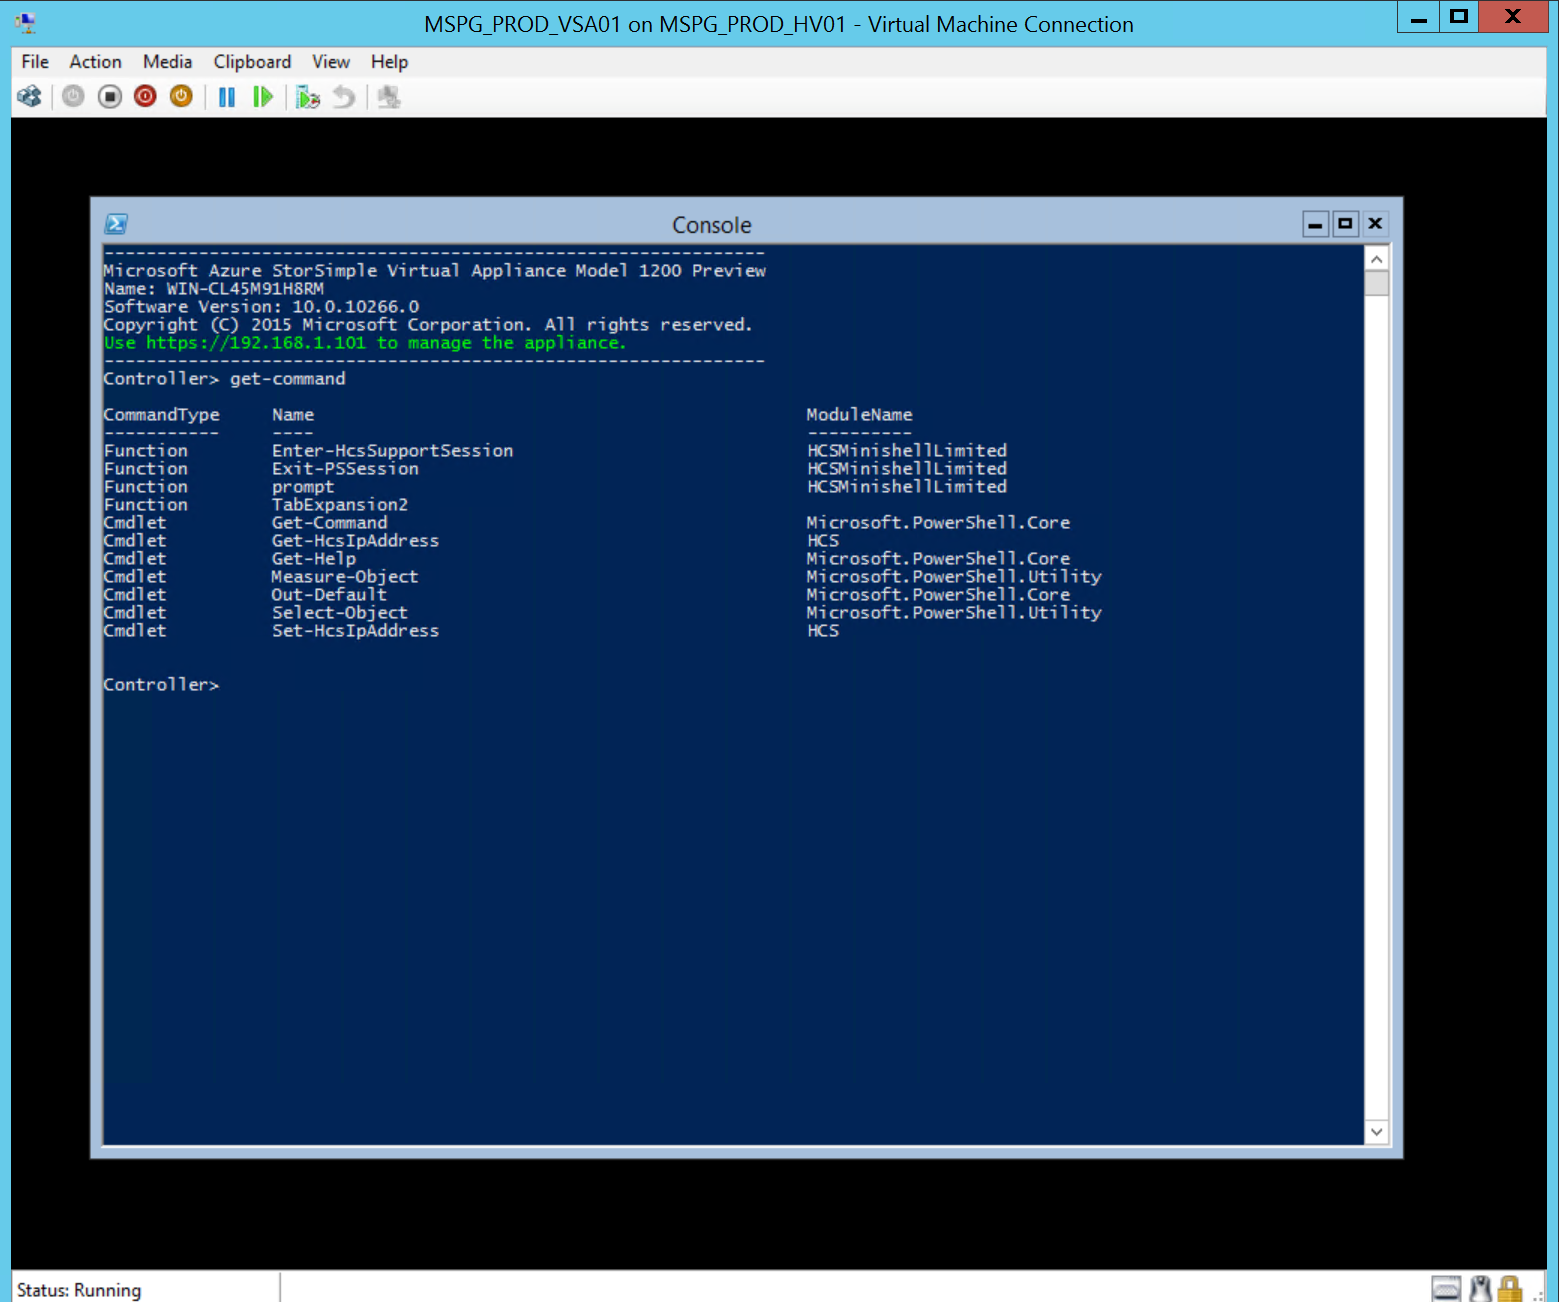
Finding myself surprised by the lack of PowerShell support of a product for the first times in years, I decided to turn to the web interface to logon to the StorSimple to test the remainder of the setup. The web interface has a very clean layout, and (ofcourse) support for SSL. The password for the first logon can be found in the documentation, which is downloadable here.
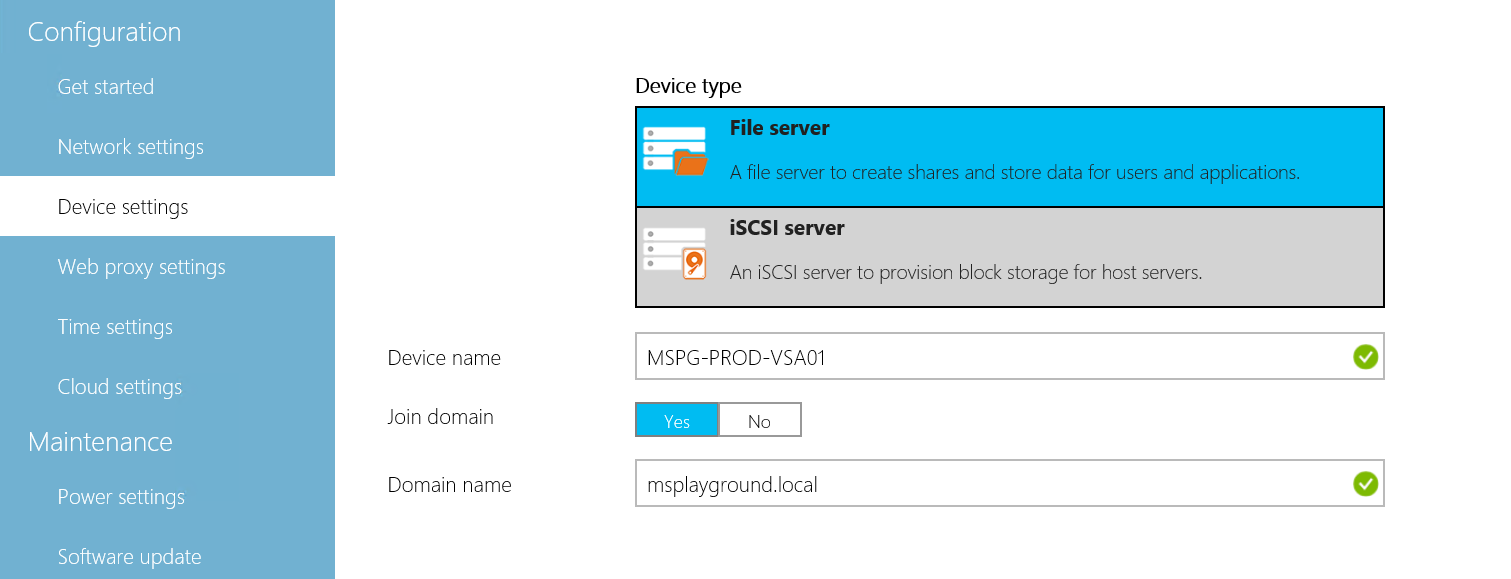
 After logon proceed to the Device Settings section on the left of the interface and select “Device Settings”. Here you’re able to select whether the device will behave as a traditional iSCSI target server or if it will host SMB shares. You can define the network name for the device and choose to join a domain or not. For this walkthrough I decided to just use a plain SMB share.
After correcting the time settings of the device, when needed, continue to connect it to the StorSimple management service with the key that was populated and shown in the software download window. You can find that key again on the Azure Management portal, under StorSimple, the StorSimple Management service you have created. At the bottom of the screen you will find a key that says “Registration Key”. Clicking that icon will present you with the key you can copy into the on-premises StorSimple interface.


![]()
The matching keys will start the proces to manage this virtual StorSimple appliance from the Azure Portal. After a short minute you will find the device under your StorSimple Management Service in the Azure portal, under the “Devices” tab.

Time to take a breath
So, let’s summarize what we’ve done so far. We’ve created a Storage Account in Azure, created a StorSimple management Service in Azure, created an on-premises Virtual Machine with a downloaded vhd. We’ve configured the local StorSimple appliance and connected it to the Management Service in Azure. So far, so good… Now for the next step… Setting up shares.
All management tasks of a normal StorSimple device normally take place on the Azure Management portal, and the product team didn’t make an exception for this device. So since I left you in the Azure Management portal, I assume you’re still there. If not, browse to StorSimple -> The StorSimple Management Service you created earlier -> Devices. Select the newly created StorSimple device and select “Shares”.

It comes to no surprise that you haven’t got any shares at this time, since we just started to deploy this device. So to create one, we’ll use the interface, and click “ADD A SHARE”, after which you’re presented with the following User Interface:
 Fill out the appropriate fields and choose to use a Tiered Share, meaning the data will be tiered out to Microsoft Azure when the algorithm decides it is time for that feature. Or you might want to use “Locally Pinned Storage” what means exactly that. The data in that case will always remain on-premises. Make sure you size your on-prem storage accordingly.
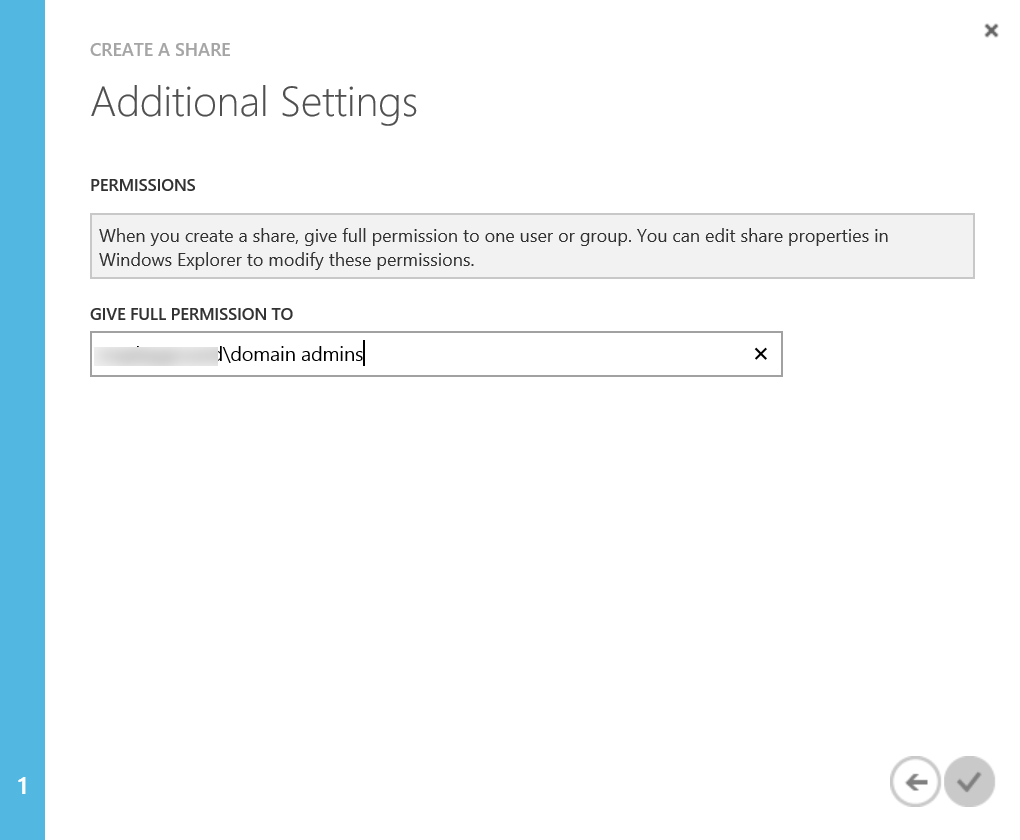
In the following interface you’ll decide which group to allow access to that share, so you might want to create a group of users for that share in advance. (See pre-requisites) It is NOT best-practice to extend this curtesy to your Domain Admins group by default. This is only done in this demo scenario.
After the creation of the share, it will immediately be visible to the outside world.

Interested in how the setup works for the iSCSI variation to this implementation? Keep your eye on this blog and watch for my upcoming post on that possibility.
For now this seems like a nice addition to the growing family of StorSimple devices. with a few pro’s and cons.
(No extra costs) |
(No solution for storage crisis) |
The limits data from the documentation:
Maximum number of storage account credentials per device 1
Maximum number of volumes/shares 16
Minimum size of tiered volume/share 500 GB
Maximum size of a tiered volume/share 20 TB
Minimum size of a locally pinned volume/share 50 GB
Maximum size of a locally pinned volume/share 2 TB
Maximum number of iSCSI connections from initiators 512
Maximum number of access control records per device 64
Maximum number of concurrent SMB connections 30
Maximum number of backups retained by the virtual device in .backups folder for file server 5
Maximum number of backups retained by the device
- 55 scheduled
- 45 manual
- 30 daily backups
- 12 monthly backups
- 13 yearly backups
Maximum number of volumes that can be processed in parallel for backup or restore 3
If you have any questions or feedback, leave a comment or drop me an email.
Bert Wolters
http://www.twitter.com/BertWolters
